Category Archives: home improvement

The dresser project

Here is a little more on the dresser project I am going to do.  I have painted this dresser a couple times and this is the current state, which it has been for probably 10 years now?  It goes with our current bedroom decor.

dresser

The top was done in a textured fleckstone, which maybe shows up better here.


WP_20140520_004

It’s getting a bit dinged up. Anyway, I am wanting a different bedroom color scheme for our new house and that means repainting the dresser. I am loving chalk paint right now, but you know frugal me just cannot stomach shelling out $30 for a quart of paint! (It makes me faint just typing that).  So, I researched and found that the component is chalk paint is Calcium Carbonate. The same stuff you take in pill form (food grade) or what you sprinkle in your garden.  I found this on Amazon for $5 for 5 pounds and free shipping!  

WP_20140520_011

The recipe is 1 part of calcium carbonate to 2 parts of paint. Plus a tablespoon or 2 of water.  You just mix the calcium carbonate with water to make it smooth, then add the paint and stir really, really well.  It doesn’t matter what finish the latex paint is as all of them turn out the matte finish with the chalk look.  The texture of the chalk paint is what is cool. It’s easily sandable, so if you want to distress something it is much easier. It also allows you to do transfers like I did to my great grandmother’s table.  

My dresser will have blue drawer fronts (clear blue sky by Valspar) and creamy top and sides (white linen by Valspar).  I have my 2 sample pots in the photo above. This is more than enough to do the dresser. Well, I might have to get another White Linen pot since I already used some to paint my table. However, the cost for the 2 paints and calcium carbonate was $11 – which makes this cheap lady pretty happy.  

I will be putting new hardware on, which will be birdcage style.

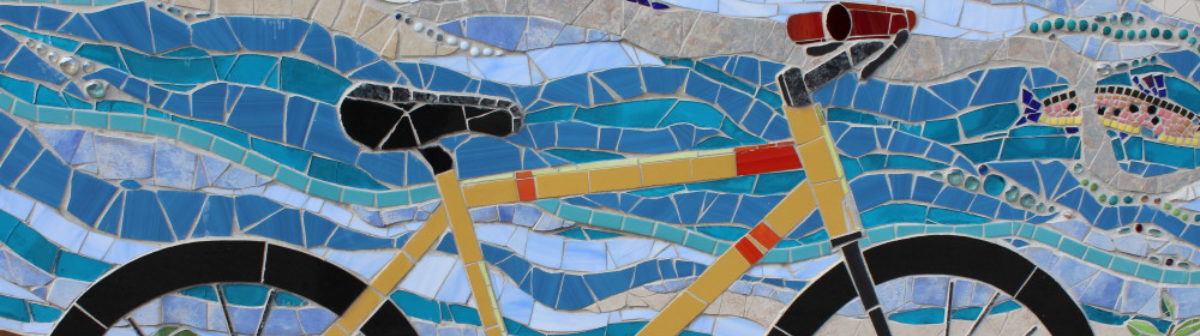
Then the cool part. The top is going to have a transfer on it with one of these 2 designs.

French-Fabrique-Transfer-GraphicsFairy-DIY-sm


or

chocolat-Cacao-Printable-graphicsfairysm

I just haven’t decided yet.  You can find all kinds of free graphics like these from the The Graphics Fairy.

I brought that old mirror in to see how it fits with the dresser:

WP_20140520_006


Please ignore Ms. Nosey.  The mirror is a little bigger than I thought and I don’t think it will work as a topper, but it might work as a headboard.  I was going to paint it the same blue as the drawers and I might do that anyway and figure out what to do with it later.

So, that’s my next project. I have to strip off the fleckstone before painting for a smooth surface, but otherwise, I can just go right over the old paint. That’s the cool part about chalk paint.

Counters are done!

Thanks winter for that last snowstorm.  Not.  It feels like the deep of winter all over again. It was only in the low 20s today and really windy. Certainly not like spring is on the way.

snow

However, tomorrow is supposed to hit 37 and then low 40s on Saturday!

So on to the title of the post! The counters are finished.  Okay,  one last little thing, which is putting polyurethane on the wood strip, but, the look is finished.  John helped me get that long wooden piece back on, which was harder than one would think.  He also put up with my super perfectionist musings about getting it just right.

Here is a reminder of what they looked like before:

WP_20140220_005

 And today:

counters

I am super, super pleased with how this came out.

So, there was some blood – more than I would have liked, a little sweat and no tears in this project.  All in all, this was not that hard a project and I wish we had done it a long time ago. We didn’t realize it wasn’t that hard to do or that expensive.  It cost a little over $300 to do this and it was money well spent. I took me fairly out of my comfort zone of home improvement knowledge, but that is how we grow, right? Now that I have learned how to laminate a countertop, would I do it again?  If you had asked me Saturday morning when I was in the midst of the frustrating time with the router and then cutting myself, I would have said no way.  However, once I got the router figured out – it was fairly easy. If I had to do it again, I would. Only in a flip house, though.  Our new house (if we ever close!!) will be getting butcher block.

Counter in use:

WP_20140313_009

.

WP_20140313_010

For a real throwback Thursday, here was the kitchen when we first moved in 8 years ago.


256kitchen

Today:

WP_20140313_011.

OLYMPUS DIGITAL CAMERA

Today:

WP_20140313_007

The only things left in this kitchen are the sink, lower cabinets and the windows. It’s a little sad because this is really the last project we will do in this house. Anything else before we move is going to be maintenance stuff like paint touch-ups.

“Counter” Productive

I made good progress on the counter. Actually the counter part is done. It’s just finishing up the tile.

I have never worked with laminate sheets before and I was really nervous about it.  I was saying to John that it is ridiculous to be so scared because I have gutted any entire kitchen, for goodness sake! Any other project like painting or tiling if you break a tile or screw up paint line, those are easy to fix and don’t really delay stuff. I knew if I made a mistake on the laminate that I would have to order another sheet and wait another week. But, I worked out and gym in the morning and then just put on my big girl pants and got to work.

The sheets were 30 inches by 8 feet, so a little awkward to work with, especially by myself.  I borrowed a router from my dad so I could trim the edges of the laminate.  It took me a long time to cut the laminate because I was trying to figure out the best method for cutting since I had a couple seams in the counter top itself because it is too long for a single sheet, plus it is an L.  I ended up with the best cut with a circular saw.  I really don’t like power saws. They just make me nervous. Anyway, a  new blade with lots of teeth and that did the job!

WP_20140309_005

Once the pieces were cut, you layer the counter and the back of the laminate with contact cement.

WP_20140308_003

PEEE -EWWWW!  This stuff stinks to high heaven. This would have been a better summer project.  Anyway, contact cement doesn’t stick to anything but itself, but once it sticks, it is stuck. Once the surface is dry to the touch (about 15 minutes), you separate the 2 pieces with dowels or scrap wood. This way you can get it lined up perfect before pressing the pieces together. It’s cool how the wood doesn’t stick to the contact cement, but as soon as the 2 surfaces touch, boom – stuck together. I pulled the piece out from the middle and worked towards each end, rolling with a rolling pin to adhere and push any bubbles towards the ends. Worked like a charm!

WP_20140308_004

I did have an accident, though.  I wore gloves pretty much all the time, but I don’t when using the saw because I don’t want anything to possibly get in the way. Besides, gloves won’t save your digits. Anyway, after I was done cutting, I forgot to put my gloves back on and was carrying the 2nd big sheet of laminate inside. Guess what? Cut laminate is razor sharp. I got a deep gash on the pad of my ring finger.  That delayed the project for a bit as I had to get it to stop bleeding, which took forever. Safety first, always! Look what happens with a small lapse. I probably could have used a couple stitches in it, but the last time I had stitches they hurt more than the cut itself – and who wants to pay for that? Anyway, it sucks because typing is my job and it is mildly sore for that, but I can’t play guitar for a few days because of the pressure. Boo!

After I got the countertops done, I tried routing to get a clean edge. It was not working. The router was moving so slow and then it would start burning the edge of the laminate (good thing I left a lot of overhang).   I fussed and fiddling with this for a while and got quite frustrated. When things don’t work right, 95% of the time it is user error, so I knew I had to be doing something wrong. I finally figured out that I needed to set the depth of the router so it actually trimmed the laminate. The blade was barely touching, which was the problem. Triple d’uh.  I wasted a couple hours messing with that.  Of course, it dawned on me later that I should have just called my dad and asked him and had the problem solved in 5 minutes. 🙄

Done!

WP_20140308_007

Then it was tile time. I tried a new product for tiling called SimpleMat and let me tell you – this stuff is great! 

WP_20140308_008

Normally tiling is laying down the adhesive, setting tile, letting it dry for a day and then grouting.  This stuff is sticky on the back of the mat and had adhesive for the tile on it. You cut it to size and peel the backing off and stick to your surface.

WP_20140308_013

Then you peel off the clear plastic and stick the tile on. Example of this not on the wall. 

WP_20140308_010

This was so, so easy! And not messy. I laid all the tile (minus the cut pieces) in about 30 minutes.  It took about 15 or 20 minutes to put all the adhesive strips on, which I did last night before going to bed.

WP_20140309_002

Pixie had to help, of course.  She liked the little tile spacers because she can bat them around.

WP_20140309_003

 I sort of semi finished stuff today to get the sink back in action. I grouted and caulked behind the sink and reinstalled that and will have to finish off the grouting and wood trim this week.

WP_20140309_006

I have to say that I am liking this new surface!  That’s it for today’s installment of Handy Ma’am!

Countertop weekend

Well, my project for the weekend is set up.  The laminate sheets came in today and we picked them up to finish the countertops.

Here is the laminate (the color is called basalt) with the backsplash to go with.

counter

It’s going to look pretty sharp if it comes out okay.  I have to admit I am a wee bit nervous about doing the laminate. I will be doing this project solo as John is going out of town.  Tile is easy peasy, so once I get the laminate down, then the rest will be fine (famous last words).

Hopefully on Sunday I will have an update with pretty counters!

My Healthy Heart Weekend and counters

Did this weekend fly by or what?  I loved getting in the emails with what everyone was doing over the course of the weekend!

I did my first workout with the Female Body Breakthrough. The exercises were grouped in supersets of 2.

WP_20140222_001

Yes, I do rehab and lifting with nail polish intact! Cause I’m cool like that 😉

Exercise Set/rep/weight
Bird Dog

Forward Ball Roll
3 set of 10

3 set of 10
Stepups

3-point dumbbell row
3 sets of 10 with 15# DBs

3 sets of 10 with 15# DBs
Partial Co-contraction Lunge (video)

Pushup
3 sets of 10

1 set of 10/ 1 set of 7/ 1 set of 6
Single-leg bridge

Bent Over Reverse Fly
3 sets of 10

1 sets of 10 with 10# DBs/ 2 sets of 10 with 8# DBs

I forgot how hard these workouts are. On paper they don’t look too hard, but the co-contraction lunge –  Such a small move by by the 8th rep on each set my legs were on Fiyah!!

Here is a detailed video on the co-contraction lunge:


John actually used a  guest pass and came with me to work out for his HH weekend 😀 . He is thinking of a gym membership, too, but not quite sold yet.

Don’t forget to get me your activity and picture for the Healthy Heart Weekend!  Email is javaqueen01@yahoo.com  . I will be doing a wrap up post and the drawing for prizes hopefully on Monday evening.  There is the New Orleans artist pin I posted about on Friday. The other 2 prizes are some locally roasted coffee and some local peanut butter!  I would have roasted coffee, but I haven’t been able to because of the cold weather (I have to roast outside).

WP_20140223_007

We got tons done on the counters, too.  Neat story here – When I pulled the tiles off the other day, about half of them came off whole. I put them on Craigslist for free figuring someone could maybe use them for a craft project or something.  I got a ton of responses, but the first person who came to get them said they were exactly what they needed to repair a floor.  Who knew my ugly counter top tile was what someone was looking for?  The man said he was actually grateful to me for giving him the tiles because he would have had to rip out the whole floor since he couldn’t find replacements for the tiles.  That made me happy to save the landfill and make someone’s day!

Anyway,  we removed the sink, took up the rest of the plywood underlayment, repaired walls, cut a new pattern for the top and got that installed. Glued and weighted down while it dries:

WP_20140223_006

We are going to do some Rustoleum countertop paint on this.  It’s a special paint designed for counters and has antimicrobial properties. Then the backsplash will be made up of these mosaics (these sheets will be divided into 4 inch strips):

WP_20140223_003

I’m getting excited to see how it comes out. Not having the kitchen sink sucks right now. Doing dishes either in the bathtub or the downstairs bath sink. Hopefully the sink will be functioning in a day or so, but the kitchen won’t be finished until the end of the week, probably.

Attacking the countertop


Sometimes when I do a home improvement project, I think and think and think and then just take a deep breath and go.  That happened today. We were planning on redoing the counters this winter. Then when we found Radiance Manor and I decided not to do them since we were supposed to move shortly.  Now there is the delay and I am back to hating the counters again and want to do something with them so prospective buyers won’t say “ick” like I do.

WP_20140220_003

Someone decided that gray floor tiles with 1/4 dark grout would be nice for a counter.  It’s not. The grout is gross and hard to keep clean.

Plus, there is no backsplash.

WP_20140220_005I ran out of work today in the afternoon and you know that saying about the devil and idle hands.  I went out into the shop and got the hammer, chisel and safety goggles.  John said something like “What are you deconstructing?”  My response?  “Nothing.”  :mrgreen:  Not like I was fooling John at all.  I am very fortunate that he pretty much lets me do whatever project I want to do without a fuss. At least outwardly anyway.

First stop was removing the wood border. I want to keep that if I can. It just needs sanding and refinishing.  This is going to be a very cost efficient project.  I am not sure about the copper paint in this house on the counter. I had the espresso machine sitting on the scrap pieces and while nothing else we did on the counter bothered it, the machine left dimples in the surface from its feet.  Granted it is a heavy machine, but so is the microwave and stand mixer.  A little bummed there, but I will be painting other things with the copper paint.

It took less than an hour to remove the tile – partially because it wasn’t laid very well.

WP_20140220_006

Yes, that is our coffee grinder. Most people have a regular coffee grinder. I don’t mess around. I have a COFFEE GRINDER.

WP_20140220_009

All done except removing the sink, but we need to use that for now.  😀  That white bag is to protect Pixie’s feet. This is where she always jumps on the counter to get to the window and I didn’t want her to get any debris on her pads or get a splinter.

I actually kind of blame Cammy for this.  She asked a question about what our kitchens looked like, which got me thinking for the answer and there you go. At least I have a project for this weekend.

Don’t forget about the Healthy Heart WeekendIt starts on Friday!

hhweek

Paint update

Hey, how about that – it’s Friday!  And an update on my counter idea.  You may remember the Rustoleum copper paint?

WP_20140131_001

Here it is on my piece of counter top.  This was 3 coats – and not super even because I was using a foam brush.

counter

This is the coolest paint ever!  It brushes on smooth  and then forms a hammered pattern, which was fun to watch.  See – watching paint dry *is* fun!!

WP_20140206_004

How cool is that?  Anyway, this alone is not strong enough to hold up as you can mar the surface.  Since I am thinking of doing a counter top with this, it needs to put up with some abuse.  So, I put some polyurethane over it.

WP_20140207_002

Now, this is semi-gloss, because that is just what I had on hand from doing the table. I will get the clear glossy polyacrylic if this turns out viable.   Now we need to abuse this piece, set stuff on it, drop things on it and see how it holds up. 

Even if it doesn’t work as a counter top, I must find another use for it because I love this finish.  I am thinking maybe some terra cotta flower pots in my tippy pot planter would look amazing with this!

Hope everyone warms up this weekend! 

Table, lights and Silent Night

Last weekend before the holiday!  I love holiday lights and we took my parents around to look in the neighborhoods.  We saw an article about a house with a massive display and headed over to see it.  They weren’t kidding!

lights

 It was interactive with lights set to music and displays that you push buttons on to make things happen.  It went around the side of the house, too. Crazy!

WP_20131219_012

I couldn’t get my camera to focus on the lights for whatever reason, but it came out kind of cool looking.

My momma at one end of a tunnel:

WP_20131219_010

John on the other end:

WP_20131219_007

It was pretty fun. Luckily it wasn’t super cold to be out exploring.

WP_20131219_006

On other news – we finished the table!  Those of you on Facebook saw this already.  We made it just in time to host Christmas Eve dinner 😀 

WP_20131221_002

It’s definitely not perfect.  The panels are a not flush to the rest of the table in some spots. Not totally sure why that is, but I think some is warpy wood and of course, the skill level of the assemblers.

This was the inspiration table from Restoration Hardware:

prod370026_av4

On sale for $1045 – $1185  – with delivery fee of $250.

Cost of our table?  $250 – and that was with buying the Kreg jig, too!  I thought our current chairs were going to look terrible, but they actually don’t look too bad.  We used this plan to build the table.

WP_20131222_002

We should fit 8 around this pretty easily. Hopefully it won’t fall apart on Christmas Eve 😀

Here is a little Christmas festiveness for you.  I wanted to post a guitar video and finally got this one done.  10 takes later 😀  This is an arrangement of Silent Night.

Sorry that you can hear the furnace blowing in the background, but it was the best take LOL! Enjoy!

Catnip, sidewalks and riding

Don’t you love those weekends where you cram a ton of stuff in?  That was this weekend.

Saturday was a little cloudy and spitting rain, so I only got about 12 miles in on the bike.  However, we got a ton of errands done.

I was even a good kitty mom and bought a special plant for Pixie!  Catnip!

OLYMPUS DIGITAL CAMERA

She adores the fresh even more than the dried and I let her nom on this before taking it away.  She was just rolling around the floor in ecstasy.

OLYMPUS DIGITAL CAMERA


I have to keep it outside or she will binge on it.  I might put it in the garden since it is a perennial and see if I can keep it permanently (without neighborhood kitties eating it.).

Then there are those projects that you thought were going to get done later, but all of the sudden are begun?  Our front walk  that leads to the front porch is in terrible shape – see?

OLYMPUS DIGITAL CAMERA

It’s embarrassing.  Kind of like our driveway was.  Well, this winter the freeze heaved a lot of this and the pieces are loose.  John was planning on taking this out and putting in pavers or laying new cement later this summer.  Little did I know he was going to start on Saturday!

OLYMPUS DIGITAL CAMERA

And by Sunday…

OLYMPUS DIGITAL CAMERA


Ah!  AHHHHHHHHH!!!!!!  😯

You all know normally I am the home improvement person, but this is John’s project to do.  (Although I do keep sticking my nose in there, because that is what I do.)  I have my own projects to work on.

We did get a chance to do some nice riding on Sunday, projects and all.  It was a beautiful day and we did 2 separate 20 mile rides.  One for breakfast and the other for yogurt!

OLYMPUS DIGITAL CAMERA


Since we rode 40 miles on the day, I got a frozen yogurt sundae with fudge and peanut butter on it.

OLYMPUS DIGITAL CAMERA


If you stop looking at the sundae and look really hard in the background you can see our bikes 😀

OLYMPUS DIGITAL CAMERA

1300 calories burned and I’ll eat that sundae!

And one more rose shot.

OLYMPUS DIGITAL CAMERA


The other day I said there were a ton of buds and now they are opening one after the other.  This rose smells incredible, too.

Bathroom Reveal!

On this episode of Casa Radiance – the reveal! The big bathroom project is done.  It turned out differently than I first envisioned it was going to be, but I love the result.  Lots of pictures, sorry.

Before (the awful):

oldvan P1130008.jpg P1130009.jpg P1200023.jpg twall

Then there was the really awful.  After removing the tile – remember this? I do.

torn up

Here is the finished bathroom:

vanity

Lovely shower. There isn’t anything we can do about the angle of the shower as this is the roof line. Only place to go from here is outside 😀 This shows the Tile Transformations.

OLYMPUS DIGITAL CAMERA

shower

Not sure if the shower curtain shows really well. I actually found it at K-mart after shopping all over.  It is a Sophia Vargas (?). I didn’t know who that was and my mother had to tell me.  Guess I had better come out from under my rock occasionally…   It’s cream colored with gold dots on it. They start sparse on the top and then cluster towards the bottom.

curtain

It’s funny – the room looks bigger. It’s about 8 feet x 8 feet and the vanity is bigger than the old one, yet it looks bigger.

wall

Towel bar moved from this wall.

OLYMPUS DIGITAL CAMERA

OLYMPUS DIGITAL CAMERA

OLYMPUS DIGITAL CAMERA

Brushed nickel on the fixtures.

OLYMPUS DIGITAL CAMERA

Originally it was going to be a tile floor with wainscoting on the walls.  Kind of went 180 from that. I decided on doing a custom paint job with stripes and a chair rail for the walls after getting a good look at the floors.  Also, this chair rail is taller than standard because of the sloping ceiling and we would have had to buy floor-to-ceiling wainscoting and cut it down, which would have left a huge amount of waste (and expense).

The biggest thing was the vanity.  I struggled a lot with deciding on the vanity because of our plumbing configuration. At first we were going to get a smaller vanity and then use a side cabinet next to it, but then realized that we could find what we needed.  The vanity is the only piece of furniture in the room, so I decided to go ahead and spend some money on it – almost half of my budget! It was so worth it, though.

Speaking of the budget, it came in at $1557 (vanity, skin top and faucet about $700).  I do need to buy a toothbrush holder and soap dispenser and a new shower caddy, so a little bit more to spend, but not much.   We will get the tub refinished at some point in the future for $400, but it just has a few nicks in it – and I told John I am not in any hurry to have someone come in and mess with my bathroom for a long time. The tile guy was going to charge me $1800 to $2000 just to do the tub and surround and all the walls. I still would have had to put in the floors ($150) and paint and a vanity, so it would have been over $2000.   I am quite pleased with myself LOL.


I always like to find a ‘favorite’ thing about each project.  This is a tough one since I love all of the changes.  I think it probably is the vanity top, although the stripes come in a close second because they came out pretty cool.  It just feels really good and I am proud of all the work I did.  It was a fairly big project to do.   I had a little help from John at the end and my dad came over to help me move the vanity, but other than that it was my project to do (and I wanted it that way).  Only a couple of minor injuries and one evening of frustration tears – so a good project all in all.


That was the last really big project to do in our house. The only thing left is the kitchen counter, which is a job on the small side. And not until next year, thank you.  Now it’s just painting and the easy stuff.