Tag Archives: recipe

Coconut Flour Waffles

I wish I could be like those of you who eat the fish bones.  With my baby steps and fish, this was too big a leap for me.  Guess that is what happens when you buy cheap fish, right?

If John cleans out the canned salmon and makes the patties, I might try them, but right now that can is sitting in the fridge.  😀

It snowed overnight and I woke up to this:

OLYMPUS DIGITAL CAMERA

It was a heavy wet snow, too.

snow


Amazingly enough, though, the sun came out and it got to about 40 degrees and melted a lot of this, including the snow on the roads. They were pretty dry by afternoon – which means getting my bike out tomorrow is a real possibility!  Woo Hoo!

Anyway, I don’t think I have ever written down my coconut flour waffle recipe, which is what I had for breakfast today.  This is a gluten free recipe and if you use a baking powder with no cornstarch – it is also grain free!

Coconut flour waffles

It really is almost the same as the protein pancake recipe, but using coconut flour instead of oats.  Now one thing to note with coconut flour – you cannot just change it measure for measure with other flours.  It is very absorbent and you really can start with half the amount.

Coconut Flour Waffles

The trick with this recipe is to be ready to go as soon as you blend the batter. If you let it stand, it will get too thick.  So, preheat the waffle iron and get the nonstick spray ready.

Serves 1.

Ingredients:

  • 1 egg
  • 14 grams of coconut flour (2 tablespoons)
  • 1/3 cup cottage cheese
  • 1/2 teaspoon cinnamon
  • 1/2 teaspoon baking powder

In a mini blender, blend all of the ingredients until smooth.  If you have to do it by hand, blend all the ingredients except the coconut flour until smooth, then mix in the coconut flour.

Liberally spray the waffle iron, both top and bottom.  Pour in the batter. You may need to spread it a bit, but it will spread mostly from the weight of the iron, so don’t worry too much.

Cook for several minutes until you can lift up the waffle iron without the batter sticking to it. Now these waffles don’t get crisp. They remain somewhat soft, so I use a spatula to roll them off the iron onto the plate.  Top as you would like!

Nutritional info:  Calories: 196; carbs 13 grams; fiber 6 grams; fat 7 grams;  protein 19 grams.  This is based on using 1% cottage cheese.

As you can see, I love to top mine with blueberries.  Surprise, surprise.

** This recipe can be a bit finicky depending on the moistness of your cottage cheese, so you might want to add a teaspoon or 2 of water if your batter is too thick.

Baked Chocolate Donut

I had seen baked chocolate donuts flying around the internet lately and wanted to give some a try.  I finally settled on this recipe from Prevention RD, although I didn’t use the glaze.  In fact, she has about a billion baked donut recipes to try on this page.

P2020017

I halved the recipe as well because I only have one donut pan and didn’t need a dozen donuts in the house, baked or not.

Ingredients:

Dry:

  • 1/2 cup white whole wheat flour
  • 2 tablespoons unsweetened cocoa powder
  • 2 tablespoons of sugar
  • 1/2 Tbsp baking powder
  • 1/8 tsp salt
  • 1/4 tsp cinnamon (my addition cause I love cinnamon in everything)

Wet:

  • 1/4 cup almond milk (or regular milk)
  • 1/2 tsp vanilla
  • 1 egg
  • 1.5 teaspoons oil
  • 2 Tbsp unsweetened applesauce

Preheat the oven to 425 F. Spray your donut pan with cooking spray and set aside.

In a medium bowl, combine all of the dry ingredients and mix to blend.

P2020007

In a separate bowl, add all the wet ingredients and beat together thoroughly.

P2020008

Add this to the dry ingredients and mix until the flour is absorbed.

P2020010

Divide the batter into your donut pan. This is actually the perfect amount of batter for this donut pan to fill them just right. Serendipity! I love it!

P2020011

Bake for 7 to 8 minutes. They really don’t take much time at all.  See how perfectly they rose?

P2020012

Pop out to cool on a rack while you make the glaze.

P2020013

For the glaze, I combined 1 tablespoon of cocoa powder and 1/3 cup of powdered sugar with 2 teaspoons of milk.  It helps if you sift the sugar and cocoa powder to prevent lumps.  When the donuts are cool, dip the tops in the glaze:

P2020014

Then let them harden up just a bit (or not!)

P2020015

Each donut without glaze is about 100 calories.  Glaze will add about 50 calories or so.  I need to double check the numbers.

P2020016

The verdict? Yum!!  This was the closest to a cake style donut that I have tried yet for a baked donut. I think the base of this recipe without the cocoa powder could be pretty versatile for other styles of donut.  I bet instead of glaze that using some PB2 would make a delicious topping!

Crock Pot Baked Ziti and a bit of standing!

I am glad you all enjoyed the stray kitty post yesterday.  If any of you end up with kitties, don’t blame me!! 😀

Wednesday is usually Bagel Day, right? Not today.  Got up and it was snowing steadily and the roads were sloppy.

P1160007

So, we decided to stay home.  I made up some pumpkin oat bran.

P1160008

Then worked for a while before going out and shoveling.  It was actually supposed to taper off in the late morning, but pretty much snowed all day.  Way to go Weather Channel!  Thumbs-down

I had a small snack after shoveling of half a protein bar.

P1160010

Anyway, today was official weigh-in day.  Marylou showed me some love and I was down today!  Finally.  First scale movement of the year.  I didn’t change anything except for 1 thing.  You know I have been trying to wrack my brain about how to find some way to stand while doing transcription.  I have tried sitting on a balance ball, which didn’t seem to make much difference as I braced myself to be absolutely still.  (I have to be still to do all the typing).  I tried standing, but it is too hard to work the foot pedal for my audio while standing. It also made me stand tilted and bothered my hips and back.  Well,  I figured if I can’t do something *while* I am working, I can do it when I am not working.  I am standing in the evening while watching TV or playing my Playstation games or even Kindle reading instead of sitting on the couch.  I have been getting an hour to an hour and a half of standing in each day this week and maybe that little bit made the difference.  D’uh! Such a simple solution and I just needed to approach it a different way. 

Lunch today was some greek yogurt with apple cranberry topping – plus about a tablespoon of granola.  It kind of looks like dessert, doesn’t it?

P1160012

Packed full of protein, though!

I also tried out my new mug I got for Christmas. My in-laws gave this to me and it is so cute – and perfect for a latte. 

P1160014

It’s an owl, if you can’t tell. It’s so cute!

We made another crock pot meal for dinner.  I did this at Christmas and it was so good we made it again.  Crockpot Ziti!  If you have a 4 quart or smaller crockpot, use this amount. If you have a larger crock pot – double the ingredients or it won’t cook right.

  • 8 ounces of ground turkey
  • One 25 ounce jar of pasta sauce of choice
  • 7.5 ounces of part-skim ricotta cheese
  • 2 ounces of part-skim mozzarella cheese
  • 1/2 cup shredded parmesan cheese
  • 8 ounces of uncooked ziti (we used whole grain)
  • 1 ounce of shredded part-skim mozzarella cheese (for topping).

In a sauce pan, brown the turkey until it is no longer pink.  Add the whole jar of pasta sauce to this and remove from heat. 

In a small bowl, mix together the ricotta, parmesan and the 2 ounces of mozzarella cheese.

Spray the liner of your slow cooker with  cooking spray.   Add a few spoonfuls of sauce to the bottom of the pot.  Add half of the pasta on top of that, spread evenly.  Next take half of the cheese mixture and drop it by spoonfuls on top of the pasta.  Spread it a little bit if you can.  Then add about half of the sauce on top of this.  Top that sauce with the rest of the pasta, then the rest of the cheese mixture (trying to spread it). Top with all of the remaining sauce.  Make sure no pasta is sticking up or it won’t cook.  Then turn the crock pot to low and cook for 3.5 to 4 hours.  If you double the batch, it will need 4 to 4.5 hours.  Check the pasta for doneness and it is done and you aren’t ready to eat, turn the cooker to warm so you don’t burn the pasta.  When ready to serve, sprinkle the last ounce of mozzarella on top and let it melt for about 5 minutes.

P1160016

I still cannot believe that dry pasta will cook this way!  It is sooooo good, too.  This makes 4 very large servings of approximately 475 calories.  I don’t want to give a concrete calorie count on this because it will depend a lot on the type of sauce you use.  Ours had 70 calories per serving (the jar has 6 servings).  Plus the pasta can vary a bit as well.  I need to try this with a gluten free pasta and see how it comes out.  It’s very filling, too.

Slow Cooker Pumpkin Steel Cut Oats (Water Bath version)

You all know I loves me some pumpkin oats.  I especially love steel cut oats, but remembering to soak them the night before is kind of a pain.  I have been obsessed with the slow cooker lately, but have not been as happy with how overnight oats come out.   They can get burned on the edges and really don’t need to cook overnight. However, I am not willing to get up at 3 am to start the oats for breakfast, know what I mean?

There are 2 brilliant solutions to this, which I wish I had come up with, but I didn’t.  One is to use a programmable light timer to have the oats start cooking at a set time.  I need to get a light timer to try this some time.

The other is the water bath method.  This allows you to turn the cooker on when you go to bed and the water bath slowly cooks the food without burning it.  I have made 2 different kind of steel cut oats this way and love it!

What you need is a smaller baking dish that fits inside your slow cooker.  Ours happen to be souffle dishes, but whatever works for you.  Place a shallow heat proof plate (or a tinfoil snake) underneath the bowl so that it isn’t sitting directly on the bottom of the slow cooker.  You want to fill the crockpot with water to about halfway up the side of the inner dish.  Not to the top or it will bubble over into your food (not good).  This will gently cook the oats and not burn them, making cleanup much easier.  The oats come out with a more pudding texture, too.

My version of the pumpkin oats for 4 servings:

  • 1 cup of steel cut oats (not the rolled oats)
  • 1 cup unsweetened almond milk (you could just do water, I wanted a bit of creaminess)
  • 2 cups of water
  • 2 teaspoons of cinnamon
  • 1 cup of canned pumpkin
  • 40 grams of dried cranberries
  • pinch of salt

Spray the smaller cooking dish with cooking spray.

Mix the oats, cranberries, salt and cinnamon together in a large bowl.

ingred


Then mix in the almond milk, water and pumpkin.  Place the smaller cooking vessel into the crockpot and fill with water to come halfway up the side of the smaller dish.  Then pour in the oat mixture.

water level


Put the lid on,  turn the heat to low and kiss it goodnight.

cooker


This cooked for about 8 hours by the time I got up on New Year’s Eve and came downstairs.

It will not look like much when you open the lid.

oats

Not really appetizing, eh? LOL.  Oats just don’t photograph well.  Anyway, give this a good stir and it will look much, much better.

I topped mine with a tablespoon of real maple syrup.  This recipe is unsweetened, so add what you like.

pumpkin oats

They are wonderfully creamy soft this way.

This recipe makes 4 servings (1-1/4 cup each approximately).  To reheat, just add a little water and heat in the microwave or on the stove top.

Nutritional info per serving:

213 calories,  3 grams of fat, 39 grams of carbs, 7.5 grams of fiber, 5 grams of protein.

** If you want to sweeten during cooking, try adding 1/4 cup of sweetener of choice to the mixture.  I would avoid cooking with artificial sweeteners because I believe they will break down with the long cooking time, but I don’t know for sure.  I like doing it unsweetened because then I can top with whatever I want, like maple syrup, honey, brown sugar, etc.

Slow Cooker Sesame Honey Chicken

You know what I love on stressful work days? Leftovers!  They are just so easy. Also, it helps when the leftovers taste even better the second day!

I have been pinning slow cooker recipes lately.  Or really, I have just been pinning a whole lot of stuff and recipes happen to be some of them.  😳

Anyhoo, this recipe caught my eye and I made it up yesterday. Originally from The Comfort of Cooking, but I changed up some of the proportions.  The only thing we bought for this recipe was sesame seeds.  Everything else was in the fridge or freezer! Yay!

Slow Cooker Sesame Honey Chicken

Ingredients:

  • 1.5 pounds of boneless chicken breasts
  • 1/4 cup diced onion (frozen diced for us)
  • 1 teaspoon minced garlic
  • 1 tablespoon oil (toasted sesame would be awesome!)
  • 1/2 cup honey
  • 1/4 cup low-sodium soy sauce
  • 2 tablespoons of ketchup
  • 1/2 teaspoon red pepper flakes
  • 2 teaspoons of cornstarch
  • 2 tablespoons cold water
  • sesame seeds
  • Hot cooked rice for serving

I have a 4 quart crock pot.  If you have a bigger crockpot, you may want to go ahead and double this recipe for better cooking.

Place the chicken in the slow cooker.

In a small bowl, mix together the onion, garlic, honey, soy sauce, ketchup, oil and red paper flakes.   Pour over the chicken.

Cover the slow cooker and cook on low for 3.5 to 4 hours.  Remove the chicken to a plate.  In a small dish, mix the cold water and cornstarch.  Add to the slow cooker and turn to high and cook for 5 or 10 minutes until slightly thickened.  Alternatively, you could pour the remaining sauce into a microwave safe dish, add the cornstarch slurry and cook for about 2 minutes in the microwave – if you are in a hurry 😀

While the sauce is thickening, use 2 forks and shred the chicken.  Add the chicken back to the sauce and heat through.

Serve over hot rice and sprinkle with sesame seeds.


Yummers!!!  This was even better today, too.

I have found that chicken in the slow cooker does better with shorter cooking times than other meats.  I don’t know how this would work if starting with frozen chicken breasts and cooking for 8 hours.  Maybe that would work without drying the chicken out?  Anyway, I made this Sunday afternoon and we feasted on it again on Monday.

Servings – Approximately 6  servings.

Nutritional stats (chicken only, no rice or sesame seeds)

Calories:  286

Fat: 5 grams

Carbs: 42 grams

Protein: 24 grams

So if you add 1/2 cup of rice, this would be about a 400 calorie dinner.  Bulk it up with some veggies, too, if you want!

Banana puff and kitties

November almost over!  I was in the mood for a warm and toasty breakfast today.  Someone had asked me in the comments if subbing almond flour for coconut flour would work in the banana breakfast bread pudding.  I wasn’t totally sure, but figured today was a good day to find out.

I shall dub this the Almond Banana Puff

Using these ingredients:

  • 1 medium banana
  • 60 grams of egg whites (probably 3 or 4?)
  • 2 tablespoons (14 grams) almond flour
  • cinnamon to taste
  • 1/2 teaspoon baking powder

First off, I put the banana and egg whites in my mini blender and whizzed them up.  You probably don’t have to do this, but the end product won’t be so puffy.  This banana was firm, so that’s why I did it.  Then I baked for 20 minutes at 350 degrees.  The result?  Basically a banana souffle.

The almond meal is not as absorbent as the coconut flour, so this let it puff up like a souffle as the batter was liquidy. I didn’t double the almond flour because it is pretty caloric compared to coconut flour.

See how fluffy this is?

Good deal.  Calories on this (without toppings) are about 220.

So on to some randomness now:

Funny, when I wrote the blog title about ‘book update’ the other day, I didn’t think that people might interpret that as a book I was writing.  I am not writing a book and have no plans on writing a book. At least a nonfiction one at any rate.  I just stick to reviewing ones I have read  😀

I have noticed that quite a few people who lost a lot of weight and then wrote books have regained a good amount of weight back.  It is just tough to put yourself in the public eye like that – especially if you struggle.  Sometimes it is hard enough having a blog and never having made it to goal :ahem:

More doin’s:

Update on Billy.  Aka Big Bill the Pill.  Isn’t it funny how we call our pets every other name but the one we gave them?

Anyhoo, Billy goes tomorrow for his neutering (don’t tell him!!) and he will be officially up for adoption at that point, although we are fostering him until then or they have another foster home that opens up to take him.  He has turned out to be quite the nice cat. Super, super friendly and kind of silly (hence the nickname).   I really hope he has a new home by Christmas.  He’s filled out nicely with all the food.

I think it looks like he has a Mickey Mouse head on his back. Does anyone else see it?

Not to be outdone in the cuteness area, here is Pixie sucking her toes in my lap today. It is so effing cute when she does this!

And if you are wondering, one of Pixie’s alternative names is P-diddly.  John christened her with that one.  I guess some cross between Bo Diddly and P Diddy :mrgreen:


I think I need a donut tonight.  Ever have times like that?

Corn and Crab Chowdah!

Ever have those weekends that go by and you wonder “What the heck did I do?”  Yep, one of those.  It is gone and not a lot happening.

We did make some good soup, though!  Crab and Corn Chowder.

Not the fancy crab, but this stuff:

Ingredients:

  • 1/2 cup finely chopped onion
  • 1 teaspoon of chopped garlic
  • 2 tablespoons butter
  • 1 pound of russet potatoes, diced small
  • 1/2 red bell pepper, diced small
  • 2 cups of corn kernels
  • 2 teaspoons of Old Bay seasoning
  • 1 bay leaf
  • 4 cups of vegetable broth
  • 1/3 cup of half and half (could use fat free if you want)
  • 2 cans of crab meat
Key ingredient – do not skip it!
In a large sauce pan, melt the butter and saute the onion and garlic for a couple minutes.  Add the pepper, potatoes, corn, Old Bay, bay leaf and veggie broth.  Simmer for about 15 minutes until the potatoes are tender.  The smaller the dice, the quicker this cooks!
After the potatoes are done, puree part of the batch.  Then add the half and half and the crab and heat through.
Makes 6 very generous servings.  I added one piece of bacon crumbled on top.  Perfection:


Sunday was cold, but sunny and not windy, so we just couldn’t resist getting out on the bikes for one last hurrah.  My bike pants are knicker length, so I had to borrow a pair of John’s socks to pull up and cover my calves.

I love how the feet part of his socks come up to my ankles. Yes – I do go out in public like this.

Just a short ride today of almost 7 miles.  It was cold LOL! I had on a technical turtleneck and 2 jackets. My body was warm, but my face was freezing and my thumbs were cold, even with gloves on.  It was nice, though.


The forecast coming up just isn’t looking any warmer and it is time to face the inevitable of bringing the bikes inside. Wahhh!!!  After this ride, we brought them in, although I haven’t hooked my bike to the trainer just yet.  Still fighting  :mrgreen:

Total outdoor miles for 2012:

Not too shabby!

Grain-free Parmesan Almond Meal Crackers

Crackers! When you go grain free, sometimes the thing you miss are the crunchy type of things like pretzels and crackers and the like.  I have seen grain-free cracker recipes and always just assumed they were hard or time consuming.  I was incorrect.  I was inspired by this recipe from Elena’s Pantry, but I wanted to add flax and give it cheese!

My version is Parmesan Almond Crackers

Only 6 ingredients, including the salt!

Ingredients:

  • 1-3/4 cups of almond flour
  • 1/4 cup (26 grams) ground flax seed
  • 1/2 teaspoon salt
  • 1 ounce of  parmesan cheese (I had shredded)
  • 1 tablespoon oil (I used macadamia, but you could use olive)
  • 1 egg

Preheat the oven to 350 F.  In a large bowl, combing the almond meal, flax meal, cheese and salt and mix well.

In a small bowl, beat the egg and oil together.  Then add to the dry.

Mix this really well.  You might want to use your hands to make sure it is thoroughly mixed, but I just worked it with a rubber spatula. It will be lumpy, like so:

Get 2 large sheet sheets of parchment paper out.  Place the dough, which I pressed into a ball, onto one sheet.

Then cover with the other sheet of parchment paper and roll it out to 1/8 inch thickness.

The top layer of parchment keeps the dough from sticking to the rolling pin, which it will, so do not just try to roll it out.  You could use cling wrap if you don’t have parchment, but you definitely need something on top or you will have a rolling pin full of mess.

What  country does this look like?

Using a pizza wheel, cut the dough into strips to the size of cracker that you want.

I made my crackers this size, maybe an inch?:

Move the parchment sheet onto a cookie sheet and place into the oven.  I had the baking stone in the oven, so I just slid the parchment paper onto the preheated stone.  Using parchment means you don’t have to try to transfer the dough, which would be hard because it is sticky.

Bake for 15 to 17 minutes or so.  It will depend a bit on how thick you have rolled the cracker dough.  After 15 minutes, I removed some of the thinner edge pieces that were getting more brown and put the rest back in the oven to finish off.  You want them lightly golden brown.  These will crisp up a bit as they cool as well.

Remove from the oven and let them cool completely. Then break up the pieces.

These are crispy and flavorful.  John thought they tasted just like grain crackers, which they do.  Yum!   They really are Crack-ers because it’s like crack eating them!

I must say that I am totally patting myself on the back for these.  I never knew cracker making was so easy.  This took maybe 15 minutes to get in the oven.

I might try doing a sweet version of these with some cinnamon as a pseudo graham cracker.

Now, these are a little higher in calories because of the nut meal, so don’t go to town on them… ooops…

The best I can do for the calories is to calculate the whole batch.

1566 calories, 127 fat grams,  29 fiber grams,  44 carbs, 72 protein grams.  Low carb and gluten free to boot.

Now my batch yielded about 11 servings of crackers at 1 ounce each. Like so:

This is approximately 142 calories. This is maybe a bit smaller than say an ounce of pretzels, but so tasty.

I am definitely making more of these – – and soon!

Waiting and Corn and Potato Chowder!

I feel like we are just waiting around here to see what happens with the storm. Being far enough upstate to feel less effects, but not knowing exactly how much we will feel it.  It’s scary seeing all the footage of down state. I think the worst part will be the days of wind since the storm will turn back east as it comes north – so we will have winds through Thursday or Friday at least.  When it is windy, it is really hard to sleep – do you all find that?

Anyway, today it has been breezy and a bit gusty at times.  The power flickered off, which makes me wonder if we will keep power tomorrow or not.  I can’t work with no power, even if the company that I work for has a generator – we do not.

While we are waiting for the storm to pass through, how about I post the recipe for the Corn and Potato Chowder?  My version is based a lot on this one.  This ends up being my 3rd crock pot recipe for the month, even though this was not going to be the planned one.  I wanted something easy to serve for the pumpkin carving party yesterday and this fit the bill!

Ingredients:

  • 1 pound 12 ounces of russet potatoes diced (the most time consuming part of this recipe)
  • 1/2 an onion diced
  • 1 teaspoon minced garlic
  • 16 ounces of frozen kernel corn
  • 3 cups of vegetable broth
  • 5 ounces of bacon, cooked and crumbled
  • 4 ounces of half and half
  • 2 ounces of low fat milk
  • salt and pepper to taste
Place all ingredients in the crock pot except for the half and half and milk.
Cook on high for 4 hours or low for 8 hours. After cooking, either remove half of the mixture and blend in a blender or use an immersion blender to blend the soup partially.  You still want lots of chunks.  Return all mixture to the crockpot, put the heat on low and stir in the half and half and milk.  (You can add more milk if you want a thinner chowder.)  Leave this uncovered to heat through.  It won’t need long as you aren’t adding much liquid.
This was so good!  Especially with a little sprinkle of cheese. I love a thick chowder like this and it wasn’t really a calorie-laden soup.  You could sub the half and half with all milk if you want.  This fed 8 people and was all gone.  I would say it probably made about 12+ cups of chowder.  I was bummed there wasn’t any left because I would have liked to hunker down with some chowder to wait out Sandy!
We are going to settle in tonight and watch football.


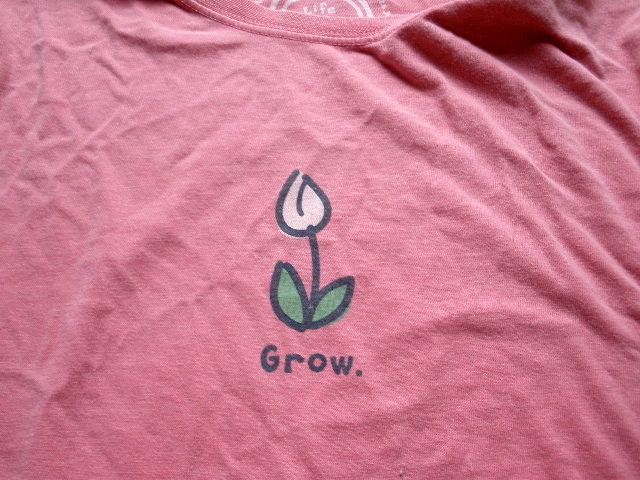
Today’s pink picture. One of my favorite t-shirts!  I have heard you can get wrinkles out of clothes if you iron them, whatever that means!  :mrgreen:


The Breast Cancer Site

Recipe: Crockpot Red Beans and Rice

I am not a bean fan, really, but I do try them from time to time.  One dish I actually do happen to like after trying it in New Orleans is red beans and rice.  I think the key is the right bean.  I am very picky about my beans.  No kidney beans for me, thank you very much.  Anyway, I came across this recipe  and decided to give it a try with a couple modifications.

Red Beans and Rice

First off, this recipe was super, duper easy.  I mean really easy!  Especially as I had the onions and peppers in the freezer already diced.  I like easy!

Ingredients:

  • 1 pound bag of small red beans
  • 1/2 onion chopped
  • 1 bell pepper chopped
  • 1 garlic clove minced
  • 4 ounces of ham or smoked sausage diced (not hot or italian style). Andouille sausage would be great if you can get it.
  • 3 tablespoons cajun seasoning blend of choice
  • 7-1/2 cups of water
  • Cooked rice for serving

Everything into the pool except for the rice, stir and cover. Cook on high for 7 hours.  That’s it! After 7 hours, I turned it down to low and just left it for another hour or so.  John cooked up some rice and we were all set.

The beans were nice and soft and not grainy at all (my biggest peeve with beans).  I was a little worried that it might be too salty, but considering this made about 8 cups of beans, it was pretty much right on.

I portioned this out and froze a bunch for future meals.  Very economical and tasty!

Red Beans and Rice


If you don’t think you like beans, give this a try.  Coming from someone who doesn’t like them actually eating and enjoying them – they are good!